An NFC Stereo Component
A Modern Problem
For a long time now, I have been concerned about the accessibility of music to my children. When I was young, I could explore the physicality of my parents’ vinyl records or tape cassettes. I could, at the worst, turn the dial on the radio and see what was on. Today, kids seem to only have the option of asking an adult to find music on their phone. While I have always been free with that access, they do not have any real way to explore. They can only ask for things they know, which tends to mean “kids’ music”. Now, I am fine with a bit of Raffi and Baby Shark here and there, but this feels like a case of letting society parent for me. My kids know kids’ music because it is what is fed to them around our culture as appropriate.
I explored a few options to give them more freedom. I thought about getting a CD player, but my options seem to be low-quality and cheap or audiophile expensive. And how hard would it be to get CDs of the albums I want? The more I thought about it, the more I expected my 3 year old to destroy my expensive CD player and painstakingly collected CDs. I got a Homepod Mini from Apple, but it didn’t help with exploration. Instead of asking me for music from the phone, they were asking Siri. I played with various options to make a music player with a screen to select from, but it felt too impersonal and constrained. It might have all the music in the world, but you would have no sense of the depth from the outside, no incentive to explore.
A Modern Solution
I do not remember how the idea came to me. Maybe I had inspiration from various products on the market, or maybe it was obvious enough that I started down this route on my own, but I started to think of building an RFID based music player. Ultimately, I was feeling overwhelmed at the time, and did not get around to it. We got a Toniebox, and this sufficed for a little while. But I was still bothered by the lack of accessibility. And worse, I was getting frustrated with my own relationship to music on my phone. As with all modern applications of smart phones, I felt like I was driven to distraction every time I picked it up. And I also wished for some better visual and tactile cues for music selection.
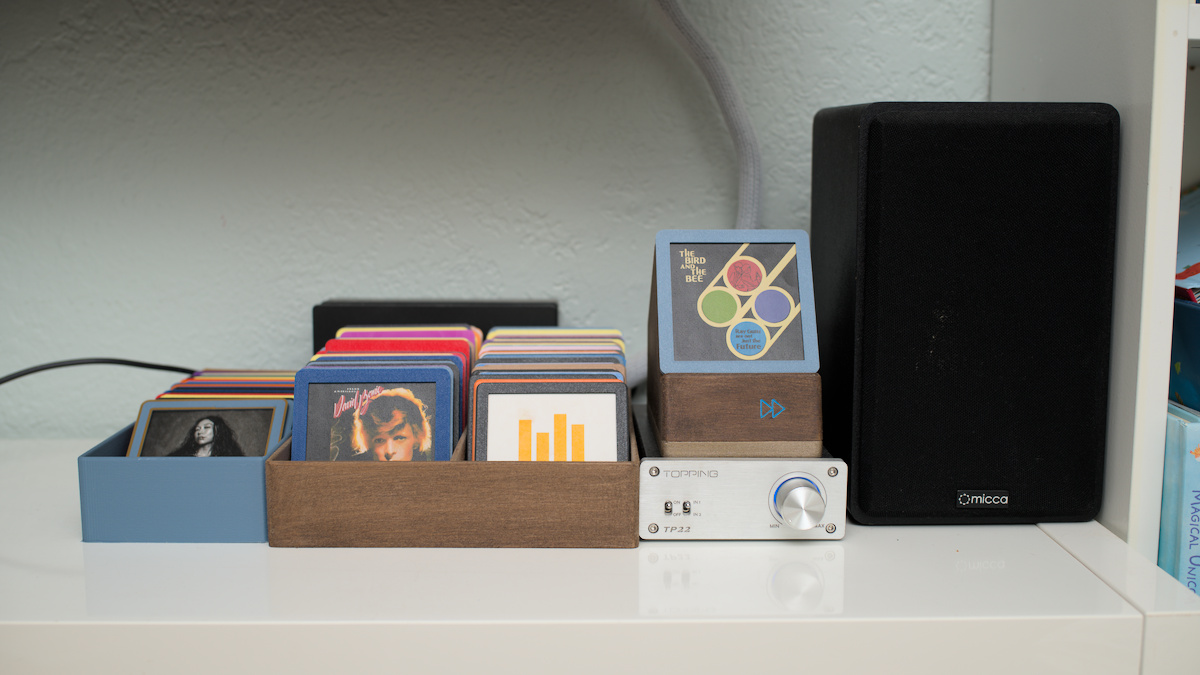
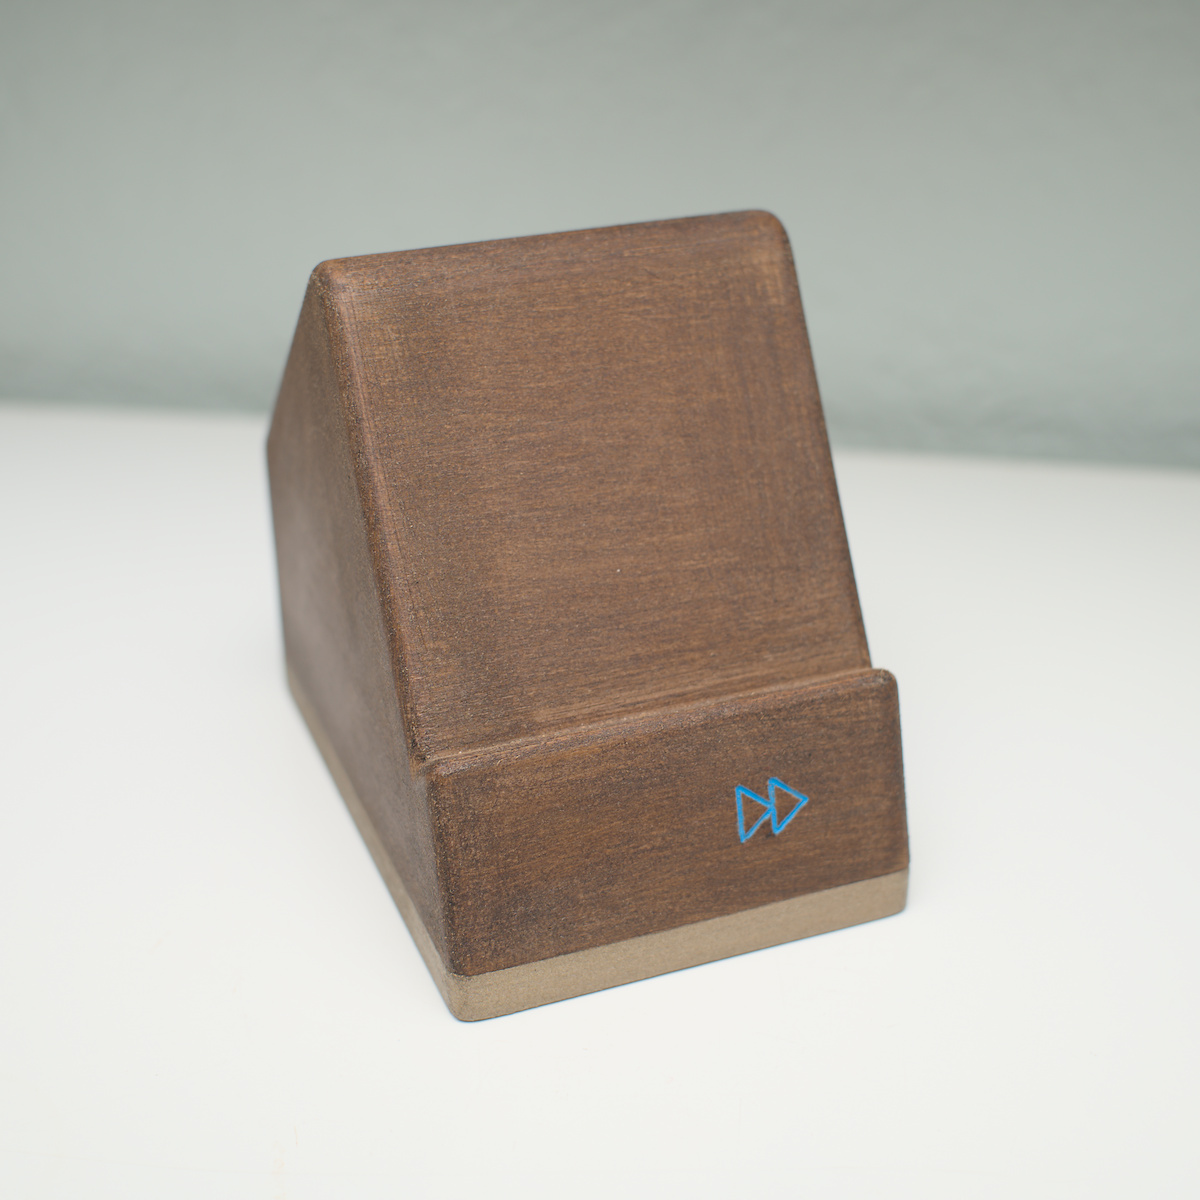
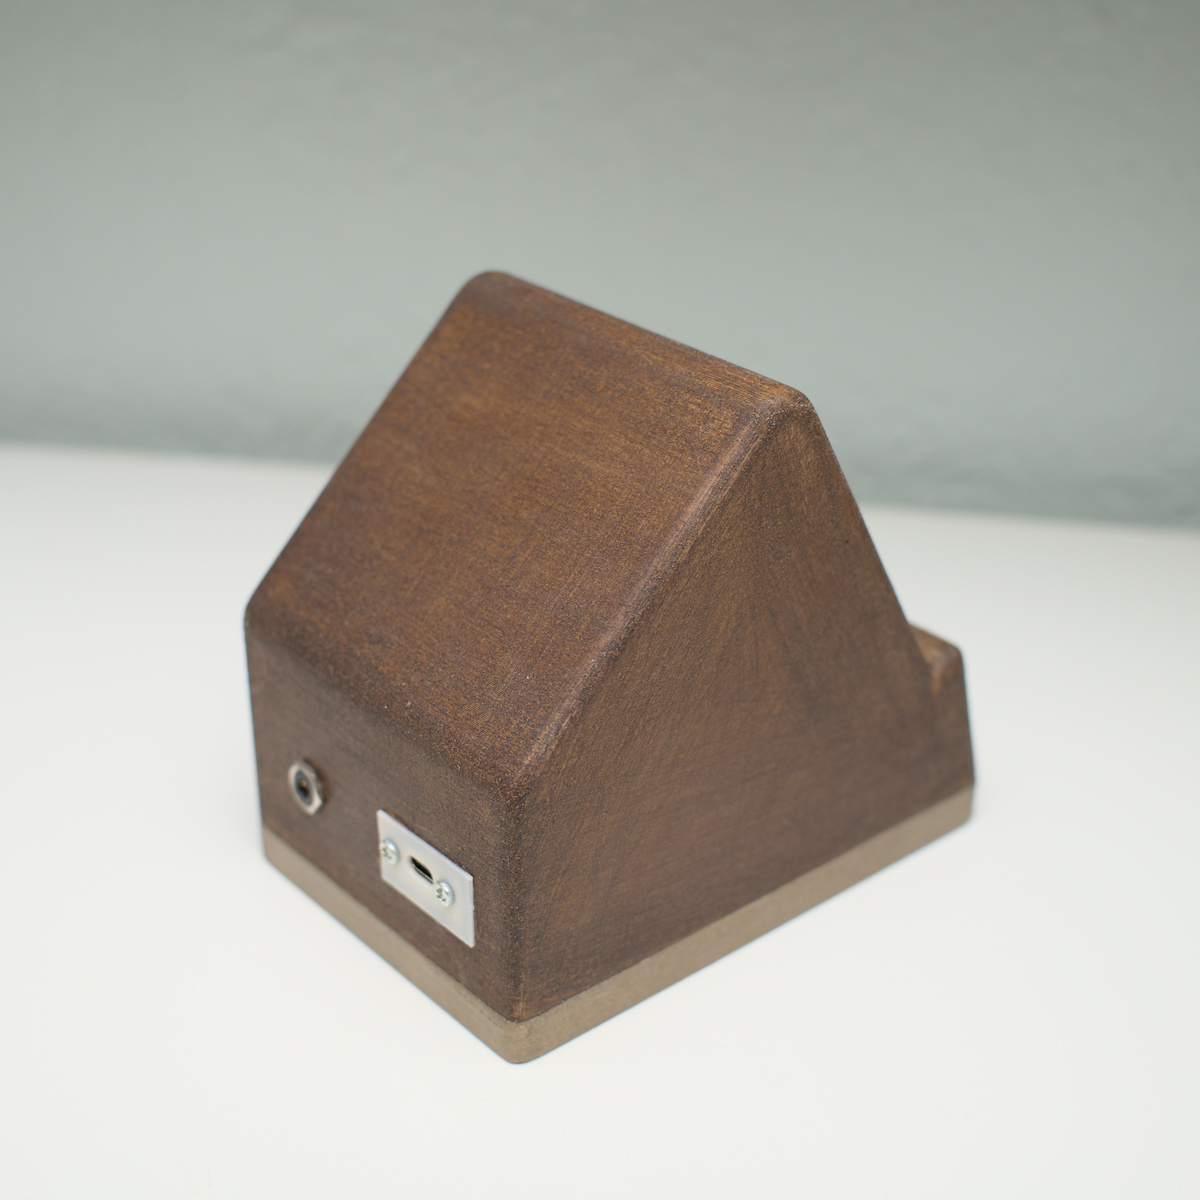
I approached the idea again this year, and found a mature looking project that did most of the software integration for me. That was enough of a start to set me to work. I ordered a Raspberry Pi 4 (the Raspberry Pi 5 does not have a built in audio interface) and an RFID hat for it. I then started designing the physical system. I got going in my CAD software to put together a housing, and then picked out an audio port and USB-C extension so I could have clean ports on the back. I designed an easily 3D printable frame to integrate album art (printed on standard paper) with an RFID sticker. When all is said and done, I am very happy with the results.
Implementation
BoM
Parts I used are linked, but may not be updated.
Hardware
- Raspberry pi 4
- USB-C power source for Raspberry Pi
- Waveshare PN532 NFC HAT
- Right angle USB-C to panel mount USB-C extension
- Right angle 3.5mm aux audio cable
- Panel mount 3.5mm aux audio jack
- 25mm NFC stickers
- Capacitive Sensor - You can build this with just components, but I found it easier to get some of these cheap little boards.
- microSD card - Enough space for your OS, software, and all the music you will store. I recommend something rated for high endurance. I used 128 GB.
- M20 nut - Optional; I designed a thread for it in the lower housing to add some weight
- 4 socket head screws, m5 x 8mm
Printed parts
- Housing Upper
- Housing Lower
- Album Frame - One set for each album
Software
- Phoniebox
- Raspberry Pi OS
- RPiPlay - if you want Airplay integration
Build
This might not be perfectly complete. I am going to outline what I did, but I didn’t exactly document it as I went along. If you follow these directions and have a problem, feel free to reach out and I’ll see if I can help.
- Print the housing upper and lower pieces.
- Paint if desired. I printed in wood PLA and sanded and stained the upper housing, I spray painted the lower housing gold. I painted the inset forward skip button with some blue model paint.
- Paint if desired. I printed in wood PLA and sanded and stained the upper housing, I spray painted the lower housing gold. I painted the inset forward skip button with some blue model paint.
- Mount the NFC hat to the upper housing built the supplied screw mounting posts.
- Cut one end off the audio cable and solder it to the surface mount, so you have a right angle plug on one end and a socket on the other.
- Install Raspberry Pi OS to the microSD car and configure your WiFi network. This device could use the ethernet connection, but I did not build a place for one into my housing model.
- Insert the microSD card into the Raspberry Pi. Plug in the right angle USB-C cable to the power input and the right angle audio cable into the audio output.
- Plug the Raspberry Pi into the NFC hat. The pins should be stiff enough to hold the Pi in place without any additional screws.
- Mount the audio jack and USB-C jack to the back of the upper housing.
- Solder wires to the back of the capacitive button board and to appropriate gpio pins on the Raspberry Pi.
- Attach the capacitive button board to the rececessed region in the upper housing. I used hot glue.
- Install the lower housing with the m5 screws.
- Power on the Raspberry Pi and log in via SSH.
- From here, I followed the documention from the Phoniebox project
- I set mine up with version 2, because the documentation suggestion version 3 was not complete. But looking into it after the fact, it seems like most new installs are using version 3 and people are not having problems with it. I would probably go with that for a new build.
Configuration
Phoniebox has a lot of configuration options. They can mostly be modified under the Settings menu of the web interface. For me, there are a few important ones.
- I wanted to have music start when I place an album and stop when I remove the album, so I set “Placing the card starts player, removal stops it.” under General RFID player control.
- I did not want to control the volume in software. I use the analog volume control knob on my amp. I played with the volume until I found a good starting point and then I set that level under Volume after reboot.
- This is important: Under Second Swipe, set up “Resume Playback”. This will allow you to pause the music by taking an album off and resume by placing it back on and gave it a “2 seconds” ignore timer.
- Lastly, I set up the GPIO for the skip button. This was more complicated. I had to SSH to the server and change a configuration file. The file was straightforward however, and the documentation gives you many options for how to set it up properly. My config looks like this:
[Skip]
enabled: True
Type: Button
Pin: 17
pull_up_down: pull_up
functionCall: functionCallPlayerNext
Albums
- You will need to upload music files for any album you want to use. Place all the files for an album in one folder. You can upload them in the Phoniebox web interface in the Folders & Files menu, or connect to the server as a network share.
- Alternatively, if you want to use streaming radio, you will need the direct, permenant URL to the audio stream.
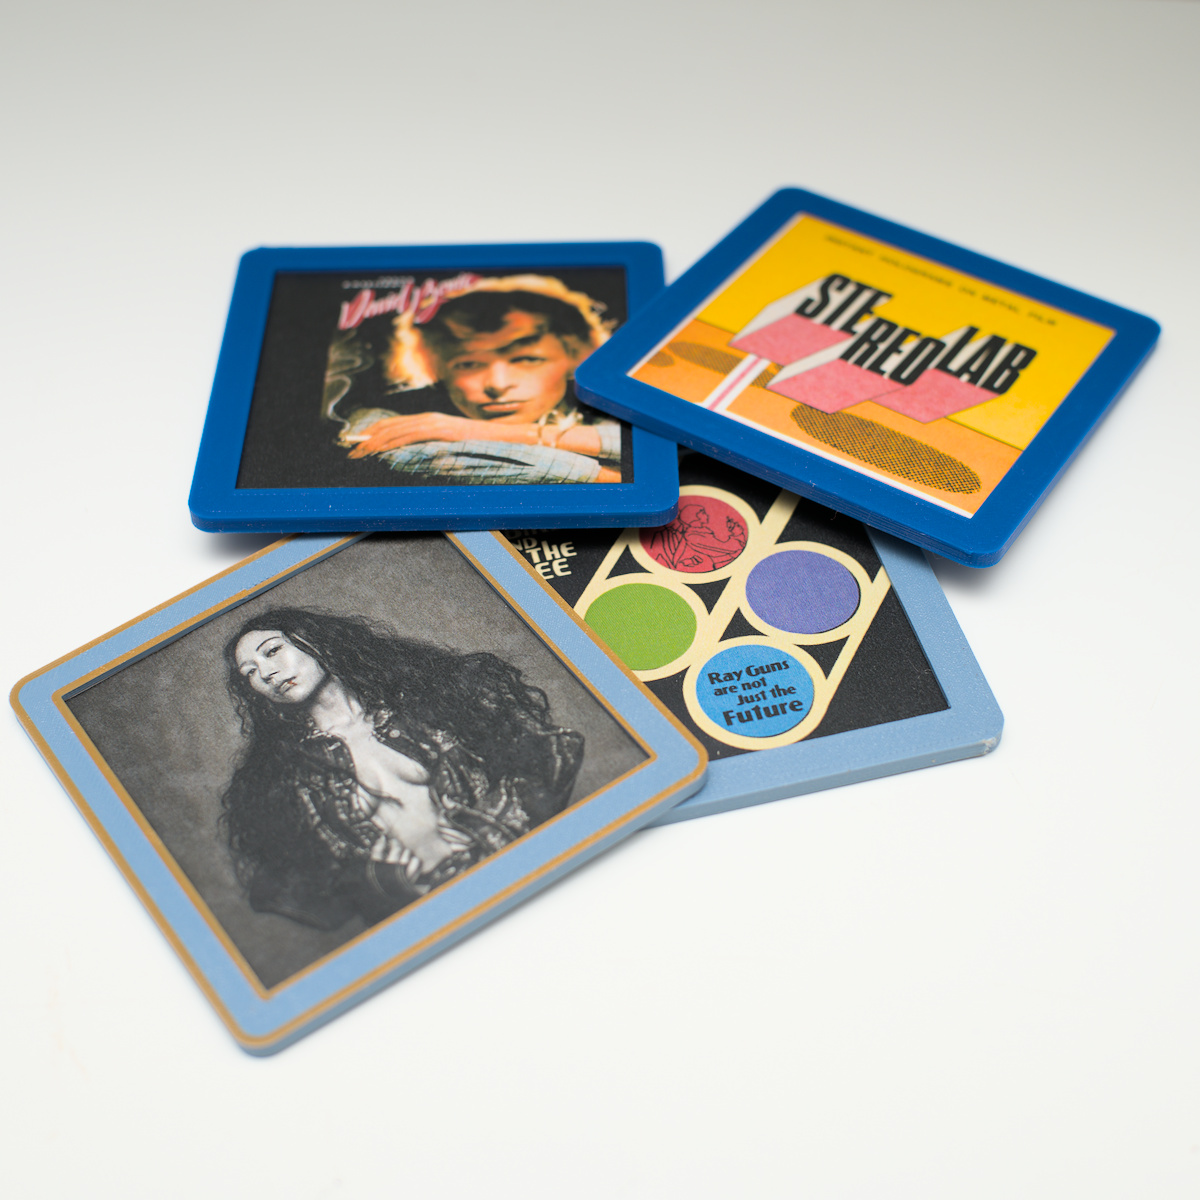
- You will need a printed pair of frame parts for each album you want to use. Alternatively, anything with a unique NFC ID can be used to start playback. That can be a card, key fob, or anything you stick one of the NFC stickers to.
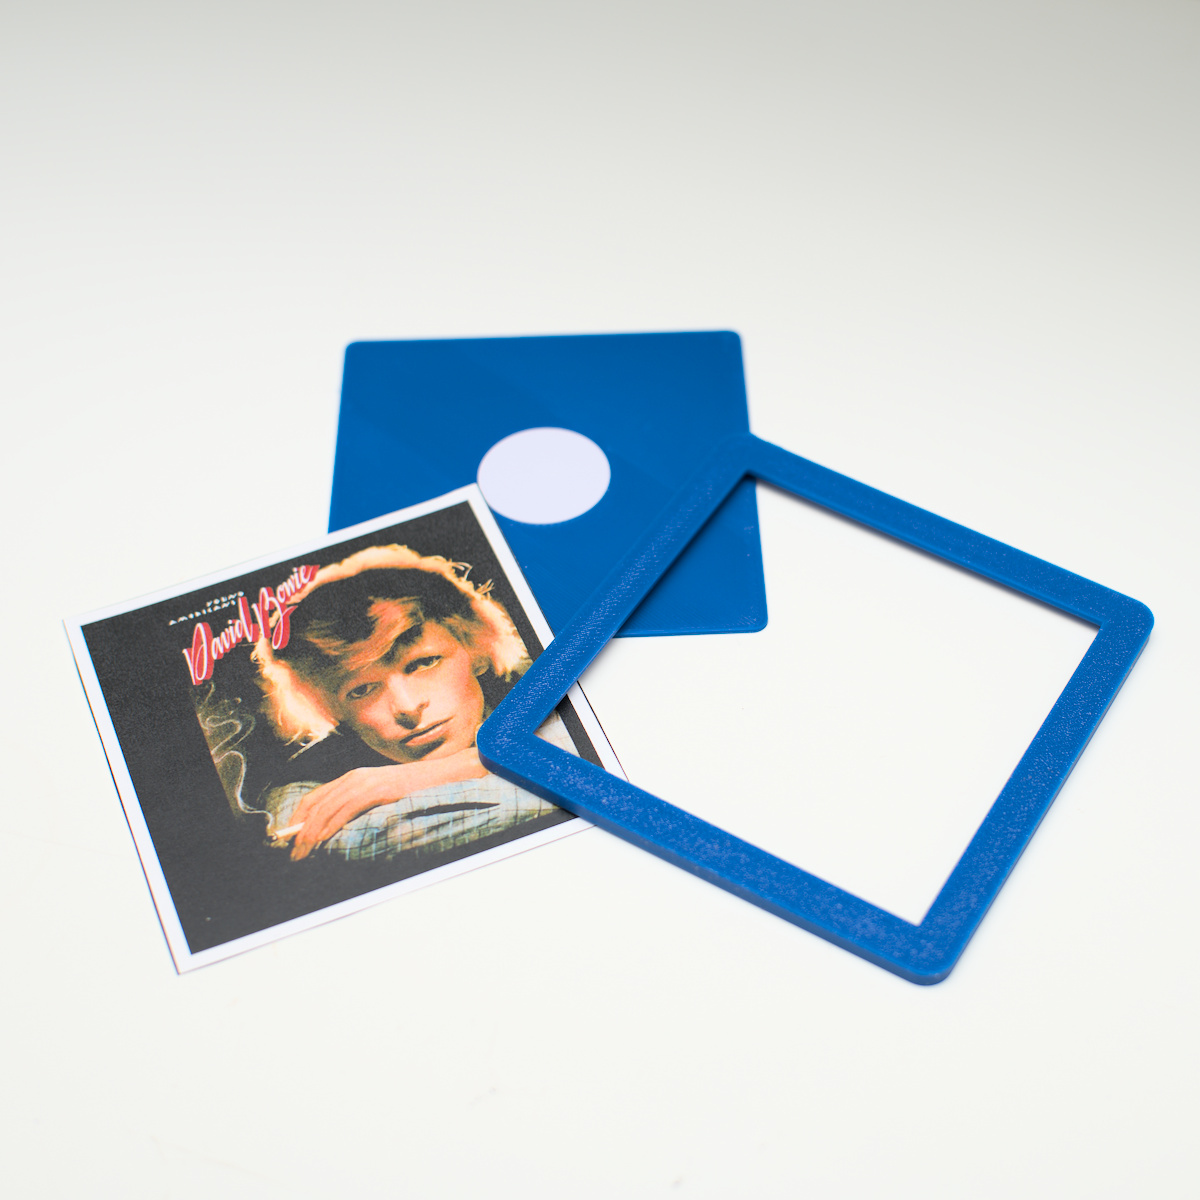
- If you do use my frame design:
- Stick an NFC sticker into the circular opening in the frame back.
- Print out the album art. You can use my template (PDF, SVG). Or you can just stick some paper in and write what you want on it. The paper an 81mm square. The album artwork should be 75mm square, centered.
- Cut out the album art along the black lines. It should fit into the Album Frame.
- The Album back should click firmly into the frame, locking everything together.
- In the Phoniebox web interface, go to the Card ID menu.
- Place your new album. You should see the value of Last used Chip ID change.
- Use the options below to link the Card ID to the album folder you want.
- If you are linking a streaming radio station, enter a name for a new folder and the URL of the stream,
- Click Submit
Results
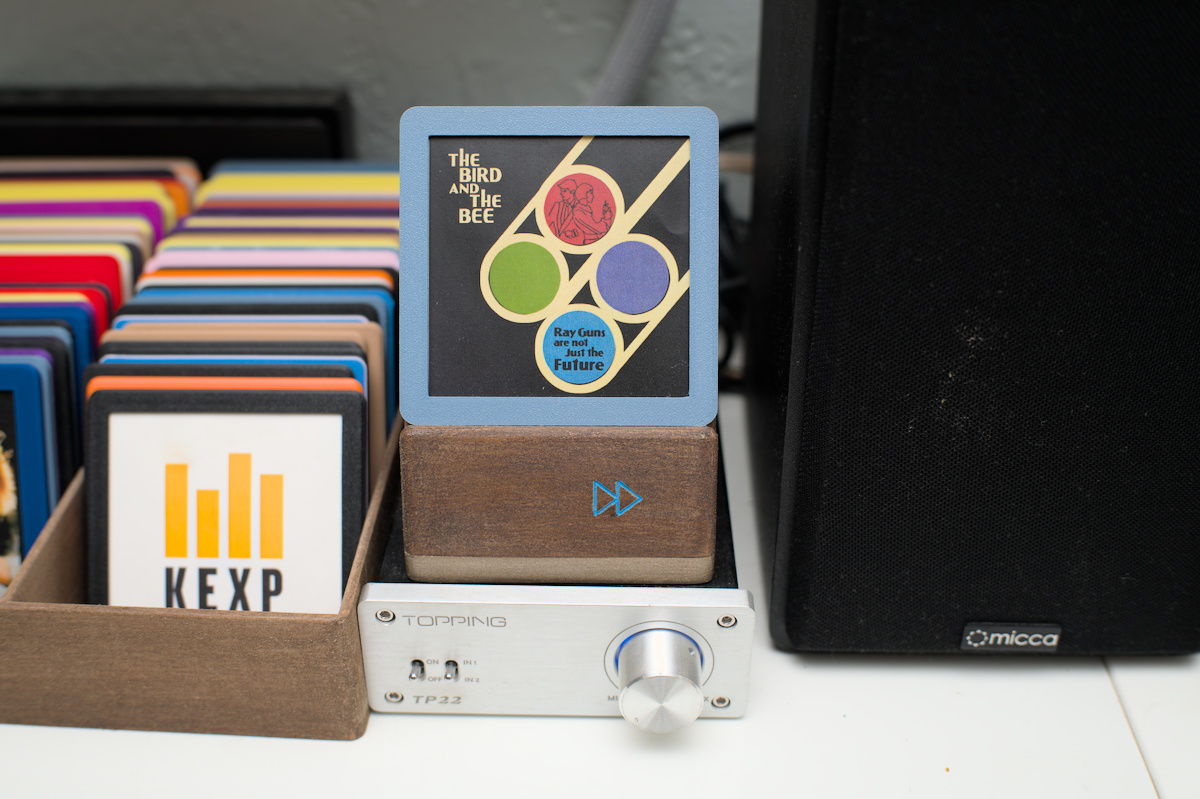
Within a week, my 3 year old was picking music with glee. He has not asked for any “kids music” since I put the player in place. Both kids are excited whenever they see that I have “printed” new albums. I would call this a resounding success.
I have been using the stereo for close to a year now. I know that true audiofiles would tell me that the audio quality on the Raspberry Pi 4 is terrible, but my living room is not a quiet space with good acoustics. In my home, with my little t-amp and bookshelf speakers, the sound is totally fine. My biggest problem is figuring out where to put all the little albums I want to make!
I could probably improve audio quality. A small USB DAC like a Dragonfly could probably fit in the case with no modification. I could certainly upgrade my amp and speakers. But I haven not felt the need. It sounds good enough for my purposes.
What has surprised me the most is how often I use the radio stations I loaded in. Easy access to streaming radio stations from around the world with easy access has given me a lot of options for things to listen to when I am not inspired to pick a particular album.
I have also been prompted to find more new music that I like. My paper template for printing album art fits 6 albums on a page. I have generally committed to always making at least one of them an album made within the last year, the more recent the better. It has kept me from wallowing in nostalgia and becoming stagnant in my appreciation of music.
Best of all, it did exactly what I wanted it to. I can put on music without looking at a screen. I can recommend music to my kids in a way they can understand. And I don’t worry about my music being a collectors item or a fragile showpiece.